Architecture of React Native

Pre-Requisites
1. Hardware requirements
RAM: 8 GB (If you are going to use the emulator on your machine).
2. Software requirements
| Software | Version |
| Android studio (IDE) | 2.2.3 |
| Android Sdk | 25.0.2 |
| Java | 1.8.0_121 |
| Node Js | 4.2.6 |
| NPM | 3.5.2 |
| React native cli | 2.0.1 |
React Native setup for Windows
First, you’ll need to install the node on your machine. If you already have node js skip the node installation steps, otherwise follow the below steps.
Node JS installation:
Download the latest node js.
Run the downloaded .msi file and follow the prompts to install.

Node.js. The installer should set the C:/Program Files/nodejs/bin directory in windows PATH environment variable by default if is not you have to set the PATH. Restart any open command prompts for the change to take effect.
Make sure node and npm are installed by typing the below commands
node -v
npm -v
React native:
After installing the node in your system, you can install react native by typing the following command in the terminal
npm install -g react-native-cli
Android Development Environment:
Android studio helps you to run the react native app in an emulator and test the app. The installation process of the Android studio is explained below.
Download and install Android Studio
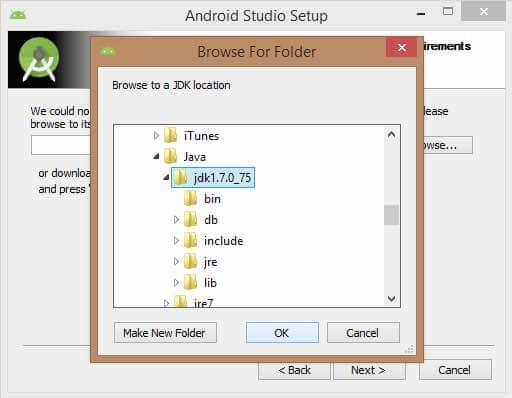
Download the Android Studio. And run the .exe file, make sure you installed Java.
Android studio requires java.
It opens the window like given below, click next to start the installation.
Below the image initiating JDK to android SDK.
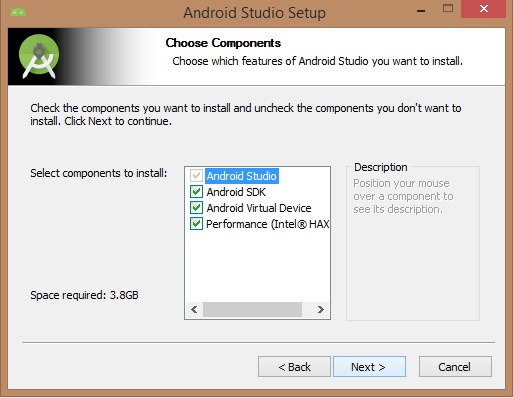
Select the components, which are required to create the applications (Android Studio, Android SDK, Android Virtual Machine and Performance (Intel chip)).
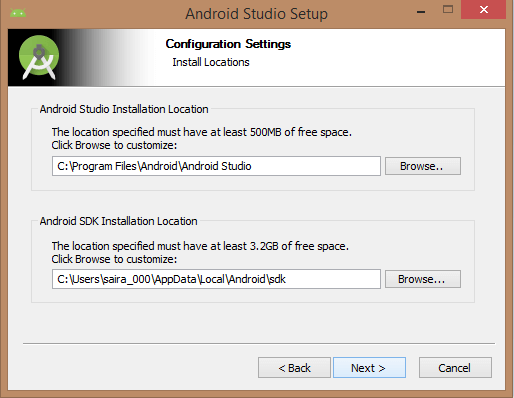
Specify the location to the Android studio and Android SDK
Specify the RAM to the Android emulator. By default, this should be 512 MB.
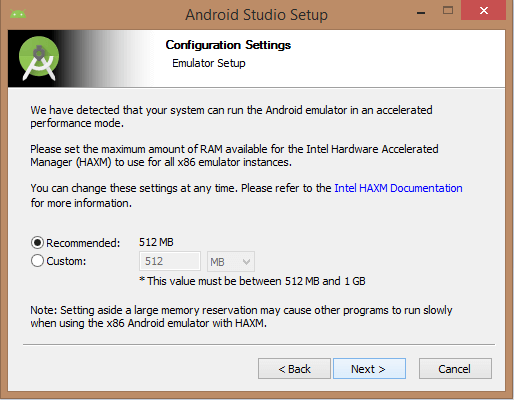
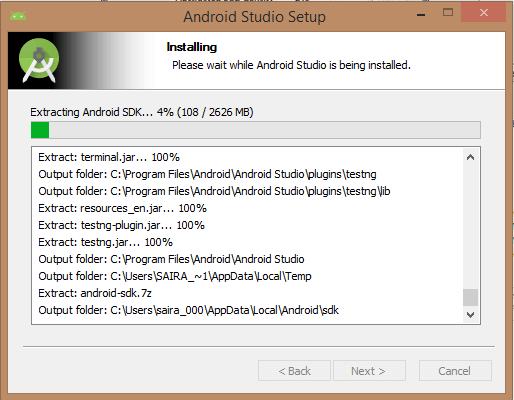
Finally, it extracts the packages to the local machine and will take some time to complete. Post the extraction, click the finish button and it will open the Android studio project with Welcome to Android studio message.
To create Android virtual Device:
Open the Android Studio and launch the AVD Manager clicking the AVD_Manager icon. Click the create a new virtual device and configure the device specification.
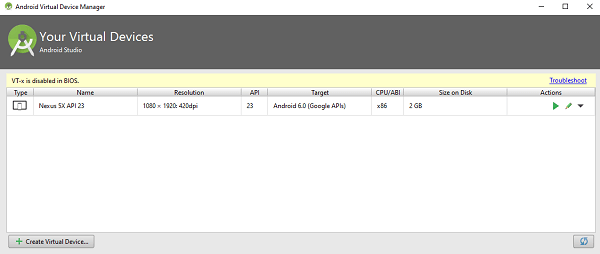
After clicking the finish button it will list the devices like in the above window.You can run the device by clicking the run button
Set up the ANDROID_HOME environment variable:
To run the react native app in emulator you need to setup the ANDROID_HOME environment variable
To setup the environment, right click on Computer → Advanced System Settings → Environment variables → New, then enter the path to your Android SDK.

Restart the Command Prompt to apply the new environment variable.
Create the First React native Project
We will create our first project by running the below command in the terminal from the folder where we want to create the app.
react-native init MySampleApp
Go to that folder,
cd MySampleApp
run the command to start package, make sure you started the emulator.
react-native start
react-native run-android
The sample project will be opened in the emulator.

That it 
from WordPress https://ift.tt/2ZKyZFa
via IFTTT


0 comments:
Post a Comment