


React is a front-end library developed by Facebook. It is used for handling the view layer for web and mobile apps. ReactJS allows us to create reusable UI components. It is currently one of the most popular JavaScript libraries and has a strong foundation and large community behind it.
ReactJS is JavaScript library used for building reusable UI components. According to React official documentation,
eact is a library for building composable user interfaces. It encourages the creation of reusable UI components, which present data that changes over time. Lots of people use React as the V in MVC. React abstracts away the DOM from you, offering a simpler programming model and better performance. React can also render on the server using Node, and it can power native apps using React Native. React implements one-way reactive data flow, which reduces the boilerplate and is easier to reason about than traditional data binding.
React Features
- JSX − JSX is JavaScript syntax extension. It isn’t necessary to use JSX in React development, but it is recommended.
- Components − React is all about components. You need to think of everything as a component. This will help you maintain the code when working on larger scale projects.
- Unidirectional data flow and Flux − React implements one-way data flow which makes it easy to reason about your app. Flux is a pattern that helps keeping your data unidirectional.
- License − React is licensed under the Facebook Inc. Documentation is licensed under CC BY 4.0.
React Advantages
- Uses virtual DOM which is a JavaScript object. This will improve apps performance, since JavaScript virtual DOM is faster than the regular DOM.
- Can be used on client and server side as well as with other frameworks.
- Component and data patterns improve readability, which helps to maintain larger apps.
React Limitations
- Covers only the view layer of the app, hence you still need to choose other technologies to get a complete tooling set for development.
- Uses inline templating and JSX, which might seem awkward to some developers.
| Sr. No. | Software & Description |
|---|---|
| 1 | NodeJS and NPM
NodeJS is the platform needed for the Cordova development. Checkout our NodeJS Environment Setup.
|
Step 1 – Install Global Packages
We will need to install several packages for this setup. We will need some of the babel plugins, so let’s first install babel by running the following code in the command prompt window.
C:\Users\username>npm install -g babel
C:\Users\username>npm install -g babel-cli
Step 2 – Create the Root Folder
The root folder will be named reactApp and we will place it on Desktop. After the folder is created, we need to open it and create empty package.json file inside by running npm init from the command prompt and follow the instructions.
C:\Users\username\Desktop>mkdir reactApp
C:\Users\username\Desktop\reactApp>npm init
Step 3 – Add Dependencies and Plugins
We will use webpack bundler in these tutorial. Let’s install webpack and webpack-dev-server.
C:\Users\username>npm install webpack --save
C:\Users\username>npm install webpack-dev-server --save
Since we want to use React, we need to install it first. The –save command will add these packages to package.json file.
C:\Users\username\Desktop\reactApp>npm install react --save
C:\Users\username\Desktop\reactApp>npm install react-dom --save
As already mentioned, we will need some babel plugins, so let’s install it too.
C:\Users\username\Desktop\reactApp>npm install babel-core
C:\Users\username\Desktop\reactApp>npm install babel-loader
C:\Users\username\Desktop\reactApp>npm install babel-preset-react
C:\Users\username\Desktop\reactApp>npm install babel-preset-es2015
Step 4 – Create the Files
Let’s create several files that we need. It can be added manually or using the command prompt.
C:\Users\username\Desktop\reactApp>touch index.html
C:\Users\username\Desktop\reactApp>touch App.jsx
C:\Users\username\Desktop\reactApp>touch main.js
C:\Users\username\Desktop\reactApp>touch webpack.config.js
Step 5 – Set Compiler, Server and Loaders
Open webpack-config.js file and add the following code. We are setting webpack entry point to be main.js. Output path is the place where bundled app will be served. We are also setting the development server to 8080 port. You can choose any port you want.
And lastly, we are setting babel loaders to search for js files, and use es2015and react presets that we installed before.
webpack.config.js
var config = {
   entry: './main.js',

   output: {
      path:'/',
      filename: 'index.js',
   },

   devServer: {
      inline: true,
      port: 8080
   },

   module: {
      loaders: [
         {
            test: /\.jsx?$/,
            exclude: /node_modules/,
            loader: 'babel-loader',

            query: {
               presets: ['es2015', 'react']
            }
         }
      ]
   }
}

module.exports = config;
Open the package.json and delete “test” “echo \”Error: no test specified\” && exit 1″ inside “scripts” object. We are deleting this line since we will not do any testing in this tutorial. Let’s add the start command instead.
"start": "webpack-dev-server --hot"
Now, we can use npm start command to start the server. –hot command will add live reload after something is changed inside our files so we don’t need to refresh the browser every time we change our code.
Step 6 – index.html
This is just regular HTML. We are setting div id = “app” as a root element for our app and adding index.js script, which is our bundled app file.
<!DOCTYPE html> <html lang = "en"> <head> <meta charset = "UTF-8"> <title>React App</title> </head> <body>id = "app">src = "index.js"> </body> </html>
Step 7 – App.jsx and main.js
This is the first React component. We will explain React components in depth in a subsequent chapter. This component will render Hello World!!!.
App.jsx
import React from 'react';

class App extends React.Component {
   render() {
      return (
         <div>
            Hello World!!!
         </div>
      );
   }
}

export default App;
We need to import this component and render it to our root App element, so we can see it in the browser.
main.js
import React from 'react';
import ReactDOM from 'react-dom';
import App from './App.jsx';

ReactDOM.render(<App />, document.getElementById('app'));
Note − Whenever you want to use something, you need to import it first. If you want to make the component usable in other parts of the app, you need to export it after creation and import it in the file where you want to use it.
Step 8 – Running the Server
The setup is complete and we can start the server by running the following command.
C:\Users\username\Desktop\reactApp>npm start
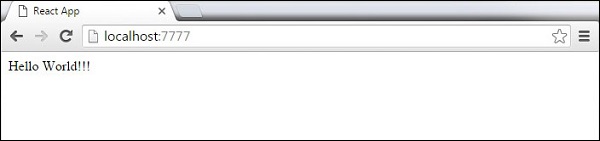
It will show the port we need to open in the browser. In our case, it is http://localhost:8080/. After we open it, we will see the following output.


0 comments:
Post a Comment